Step-by-Step guide to Knowledge Base
If you are reading this, you already found our GitHub repository, which Knowledge Base is hosted on.
When you first enter Knowledge Base you see a screen like this:
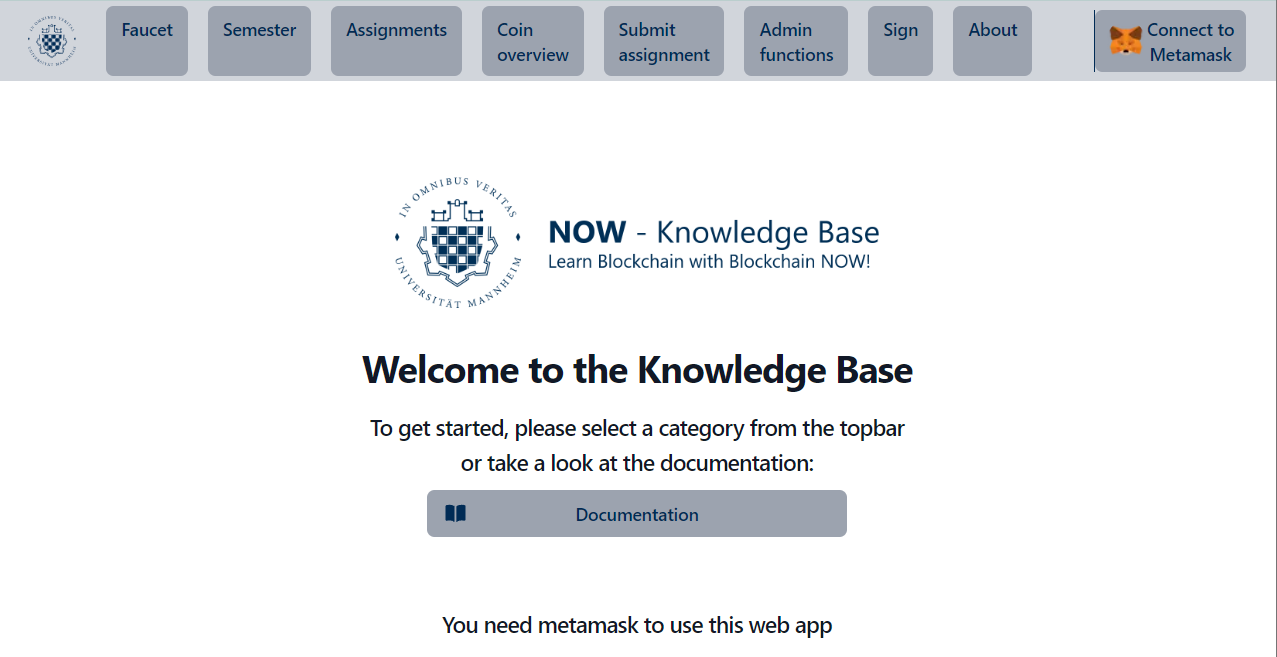
So you have a Faucet, Semester, Assignment, Coin Overview, Submit assignment, Admin functions, Sign, About and Connect to Metamask button. The admin functions buttons will disappear, once you are logged in with your Metamask wallet, because this is for administrators only. A visualisation of how your screen will look like, once you are logged in, can be found in the next section.
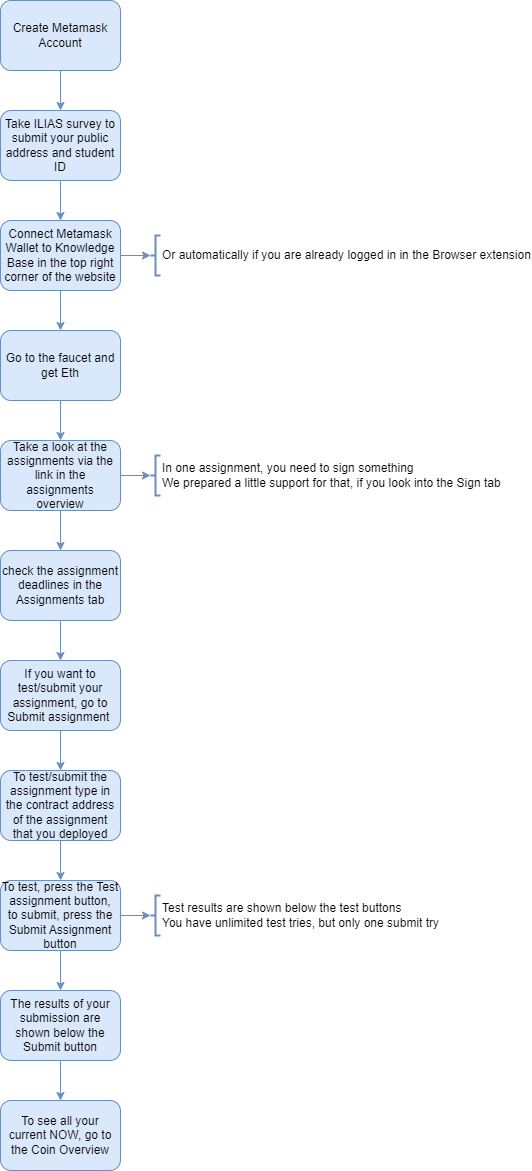
In this guide, you get a step-by-step instruction on how to use Knowledge Base. If you want a shorter version, you can scroll down to the end of this page to look at a flow chart of the process.
Step 1: Log in with your metamask wallet
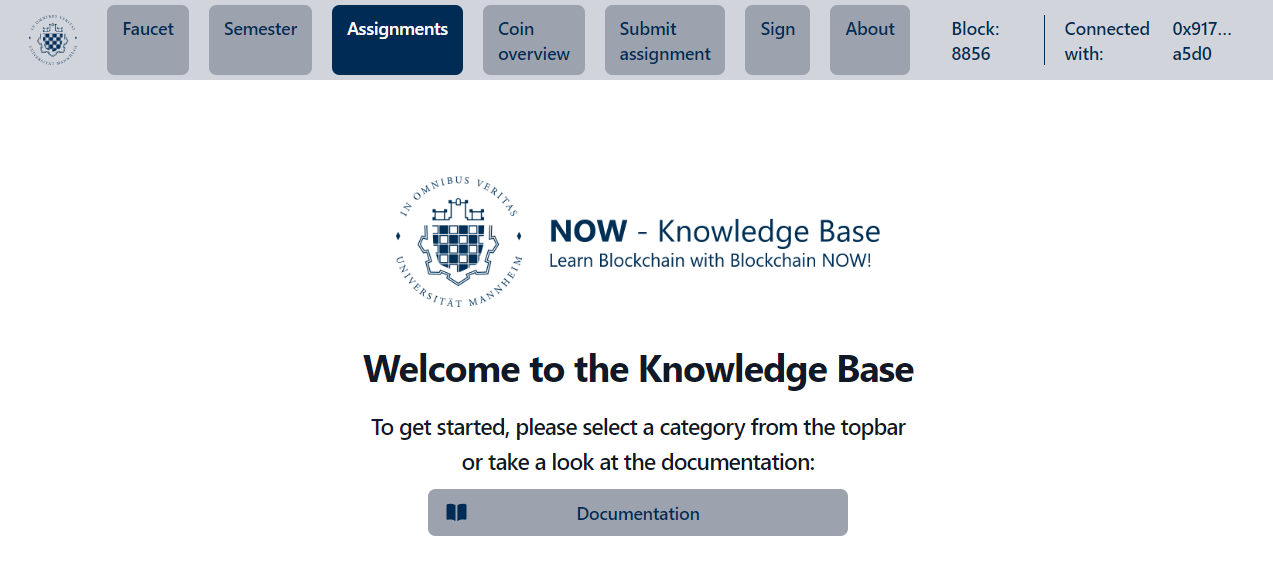
To use Knowledge Base, you need to have a metamask Wallet and login with your wallet address in Knowledge Base. To do so, please read the documentation Metamask Setup, because this is a whole other process. To log in on Knowledge Base, you need to press the Connect to Metamask button and type in your password. Then press the unlock button. Now you should see your public address in the top right corner instead of the Connect to Metamask button and the whole page should look like this:
Step 2: ILIAS survey
Once you have created your Metamask wallet and got your public address, please take the survey in the course on ILIAS. You have to enter your student ID (Matrikelnummer) and your public address, so that your achieved Knowledge can be traced back to you. Keep in mind, that if you do not take the survey in time, the lecturer can´t see your Knowledge, and you are not qualified for the exam!
Step 3: Get gas
Once you are logged in with your Metamask wallet, you can go to the faucet and get Eth. You need Eth to make transactions on the blockchain as you might have already learned in the lecture. So just type in your wallet address and press the Get Eth button to - you guessed it - get Eth. You can use the faucet multiple times but only every once in a while because it has a cool down to stop motivated students from limit testing the Raspberry Pi´s.
Step 4: Semester overview
In the Semester Overview you see the semesters you are currently in and the block range for the semester.
Step 5: Assignments for the semester
In the Assignment Overview you see all the assignment tasks which you have to complete in the semester. You won´t see a due date or time, but only starting block and end block for submission. One block is signed after 12 seconds. So you need to find out the current block number and calculate your due date on your own. The tasks itself are found on each assignment via a link that leads to a PDF document. There you can see the task descriptions and the maximum Knowledge you can earn. With your calculated due date and the task you can start with the tasks.
The validator contracts can only correctly evaluate your code, if you follow the instructions in the task description. So please read them carefully, before you start coding.
Step 6: Submitting/testing your assignments
At Submit assignment, you can hand in your code. You need Eth for those steps, so make sure, that you used the faucet before. To submit or test, you have to deploy your solution on the blockchain. This is done via hardhat. You can find a guide on how to do that here: Deploying with Hardhat. Then you can see the contract address of your code. In Knowledge Base, when you provide that contract address, in the background there is a smart contract or validator contract, that tests your code. The validator contract consists of a number of tests. According to the number of tests passed you achieve your Knowledge from the validator contract directly to your personal wallet, which may take a second.
You can test your code to see, how much Knowledge you would get for the current state of the code. You can also see the test results under the test button, to see, which tests you passed and which you failed. You can test as often as you want, but you have to deploy the changed code again to test it again. Don´t forget, that the contract address changes every time you deploy a new version of your code.
Only when you press the submit button, the contract will give out the Knowledge amount you got. You can only submit once and can not undo a submission! The results of your submission are shown below the submit button. Because a lot of traffic is expected around the deadlines, try to submit your code early, so that you can get your submission in a block before the deadline. To further reduce the problems with the deadline, you can submit your code up to 24 hours after the deadline and still get 100% of the Knowledge for the assignment. If you submit your code after this buffer of 24 hours but within the next 5 days, you will get 85% of the Knowledge you achieved for the assignment. After that, you will not get any Knowledge for the assignment anymore. Here is a little visualisation of that:

Be careful, you can only submit or test a contract address from the public address that deployed it.
You can see your Knowledge in the Coin Overview. In the Coin Overview you also see how much Knowledge is needed to qualify for the exam and how much Knowledge you still need for the qualification.